LLM Assistance
Overview
Inspect Viz is a new library so details on using it are generally not available within the training data of LLMs. Even so, there are a couple of techniques you can use to get assistance:
Inspect Viz makes it’s documentation available in an LLM friendly markdown format (/llms.txt) which you can register with IDEs or coding agents (or paste into model context windows).
Inspect Viz is built on top of the Observable Plot JavaScript library, so asking an LLM how to do things in Observable Plot will typically yield useful advice.
llms.txt
There are various versions of LLM friendly documentation available. Use the llms.txt variant to register documentation with an IDE or coding agent (details below) or the other variants for pasting into a model context window.
| llms.txt | Documentation index (links to other docs). |
| llms-guide.txt | Documentation excluding reference (138k). |
| llms-full.txt | Documentation including reference (529k) |
The llms-guide.txt file works well for models with a 128k or 200k context window (e.g. Claude 3/4, GPT 4 or o3/o4). The llms-full.txt file requires a model with a larger context window (e.g. GPT 4.1, Gemini 2.5).
Details are provided below on how to register /llms.txt for use with Claude Code, Claude Desktop, and Cursor.
Observable
Inspect Viz is built on the Observable Plot JavaScript library and consequently it’s Python API maps quite closely to Observable’s JavaScript API. For example, here is an Inspect Viz dot plot and the equivalent Observable dot plot:
plot(
    dot(
        penguins,
        x="body_mass",
        y="flipper_length",
        stroke="species",
        symbol="species"
    ),
    grid=True,
    legend=legend("symbol")
)
Plot.plot({
  marks: [
    Plot.dot(penguins, {
      x: "body_mass",
      y: "flipper_length",
      stroke: "species",
      symbol: "species"
    })
  ],
  grid: true,
  symbol: { legend: true }
})
If you are looking to refine the appearance of plots or create a custom plot with advanced elements, ask an LLM how to do it in Observable Plot and you can very often translate this into the equivalent Inspect Viz construct.
Claude Code
You can configure Claude Code with access to the Inspect Viz documentation using an MCP server. To add the documentation for Inspect Viz to the project in the current working directory, execute this:
claude mcp add-json inspect-viz-docs '{"type":"stdio","command":"uvx" ,"args":["--from", "mcpdoc", "mcpdoc", "--urls", "inspect_viz:https://meridianlabs-ai.github.io/inspect_viz/llms.txt"]}' -s localAlternatively, configure the following MCP server for your project by editing the Claude Code config file (~/.claude.json):
"mcpServers": {
   "inspect-viz-docs": {
      "type": "stdio",
      "command": "uvx",
      "args": [
      "--from",
      "mcpdoc",
      "mcpdoc",
      "--urls",
      "inspect_viz:https://meridianlabs-ai.github.io/inspect_viz/llms.txt"
      ]
   }
}
Claude Desktop
To register an Inspect Viz MDP server with Claude Desktop, do the following:
Ensure that you have installed the uv Python package manager.
Note the full path to the
uvxbinary by executingwhich uvxin a terminal (you’ll neded this for configuration below).Open
Settings/Developerto update theclaude_desktop_config.jsonfile. Add theinspect-viz-docsMCP server into the config:{ "globalShortcut": "Alt+Ctrl+Space", "mcpServers": { "inspect-viz-docs": { "command": "/full/path/to/uvx", "args": [ "--from", "mcpdoc", "mcpdoc", "--urls", "inspect_viz:https://meridianlabs-ai.github.io/inspect_viz/llms.txt", "--transport", "stdio" ] } } }Note that it is critical that you provide the full path to
uvxin the “command” configuration.Restart Claude Desktop. If you go to
Settings/Developeryou should see something like the following: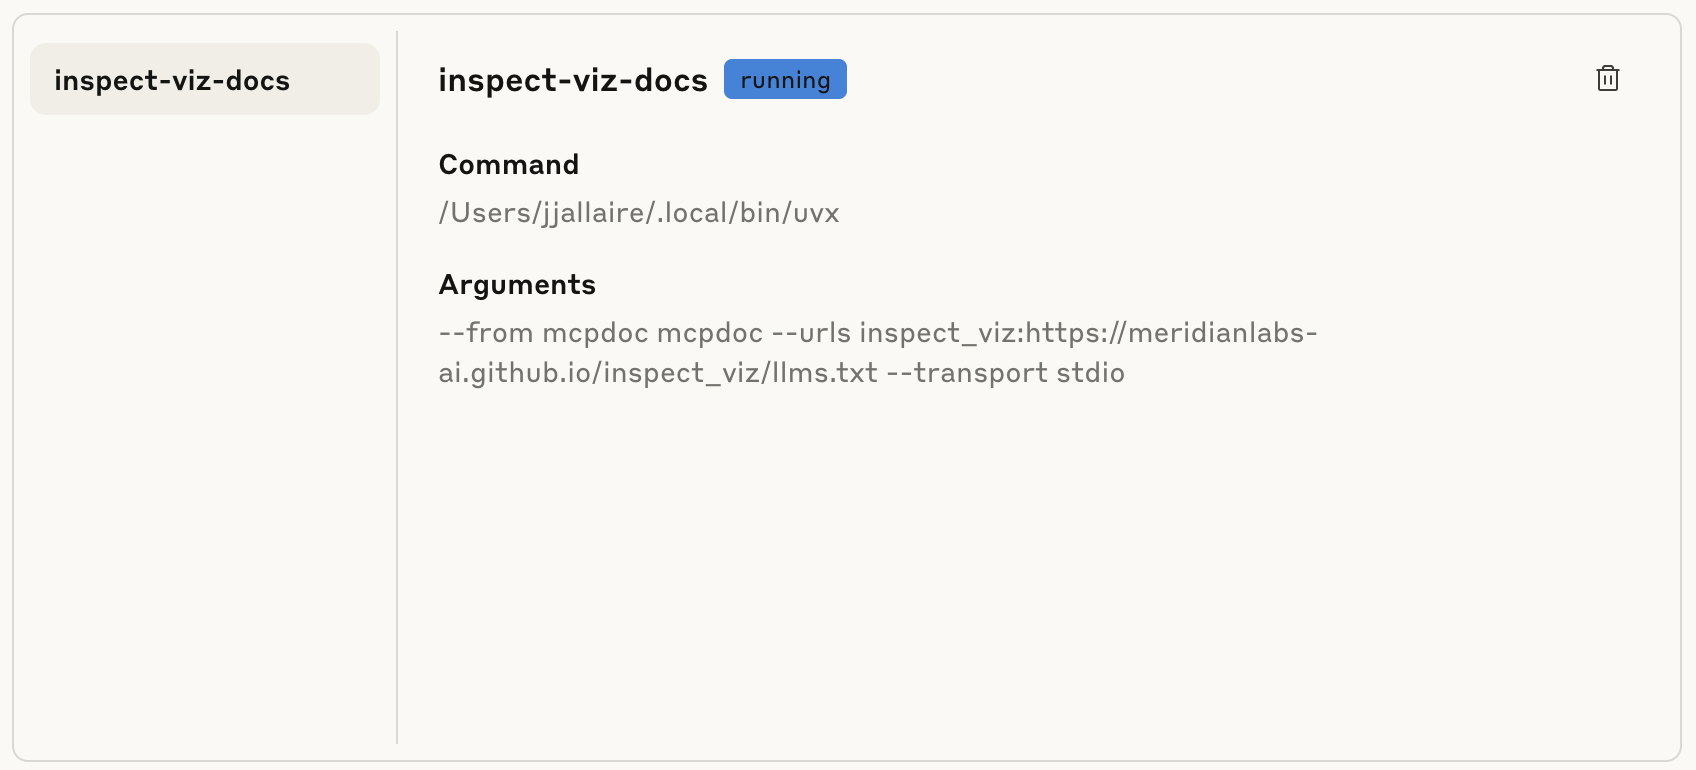
Cursor IDE
You can use /llms.txt documentation within Cursor in one of two ways:
Use @Docs to register the Inspect Viz documentation with Cursor, which will index and retrieve sections of the documentation as required.
Use the mcpdoc MCP server configured with the Inspect Viz documentation. To do this, register an MCP server within the
~/.cursor/mcp.jsonconfiguration file as follows:{ "mcpServers": { "inspect-viz-docs": { "command": "uvx", "args": [ "--from", "mcpdoc", "mcpdoc", "--urls", "inspect_viz:https://meridianlabs-ai.github.io/inspect_viz/llms.txt", "--transport", "stdio" ] } } }Then, add the followiing to
User Rules(found withinSettings/Rules):For ANY question about Inspect Viz, use the inspect-viz-docs MCP server to help answer -- call list_doc_sources tool to get the available llms.txt file call fetch_docs tool to read it reflect on the urls in llms.txt reflect on the input question call fetch_docs on any urls relevant to the question use this to answer the question